The fact that most PC users no longer need optical drives and other devices that require external bays allows case manufacturers to use the front panel for various design tricks. We will get acquainted with one of these approaches using the example of the hero of the current review.

The Vinga Polaris case will cost around $70, making it noticeably more expensive than other tested siblings in the model range. However, the increased price is justified by the use of tempered glass front and side panels, as well as the presence of three pre-installed LED-lit fans. How all this looks and works, you will find out further.
Specification
|
Model |
Vinga Polaris |
|||
|
Case Size |
Middle Tower |
|||
|
Motherboard Form Factor Support |
ATX / microATX / Mini-ITX |
|||
|
Color |
Black |
|||
|
Bays |
External |
None |
||
|
Internal |
2 x 3.5” / 2.5” 3 x 2.5” |
|||
|
Expansion Slots |
7 |
|||
|
Maximum GPU Length (in brackets - own measurements with / without front fans) |
400 mm (350 / 370 mm) |
|||
|
Maximum CPU Cooler Height (in brackets - own measurements) |
163 mm (163 mm) |
|||
|
Ports |
1 x USB 3.0 2 x USB 2.0 2 x audio ports |
|||
|
Pre-installed Front Panel Fans |
3 x 120mm |
|||
|
Fan Installation Capability |
Front Panel |
3 x 120mm |
||
|
Rear Panel |
1 x 120mm |
|||
|
Top Panel |
2 x 120mm |
|||
|
Power Supply |
None |
|||
|
Materials |
Front Panel |
Tempered glass 3.9 mm thick |
||
|
Chassis |
Steel 0.55-0.65 mm thick |
|||
|
Left Side |
Tempered glass 3.9 mm thick |
|||
|
Right Side |
Steel 0.69 mm thick |
|||
|
Case Dimensions (in brackets - own measurements) |
459 x 430 x 215 mm (463 x 430 x 218 mm) |
|||
|
Weight |
6.85 kg |
|||
|
Manufacturer's Website |
||||
Packaging and Supply Kit

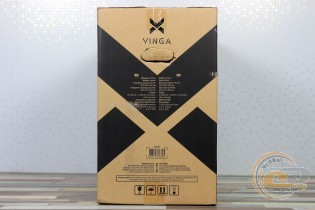
A simple box carries a brief specification table and a monochrome image of the case - quite informative, and such packaging won't hit the budget.

Also, the modest supply kit includes:
- a set of screws and standoffs for motherboard installation;
- a set of screws for securing the power supply and drives;
- system speaker;
- cable ties.
The latter are an inexpensive yet very pleasant and useful addition, especially if the PSU is not equipped with a modular cable system.
Appearance
Glass panels allow the Vinga Polaris to stand out among numerous other Middle Tower cases. Moreover, when viewed strictly from the front, you might not immediately guess that it's a system unit. However, the more traditional top panel won't let that be hidden.
The front glass is attached with four screws with decorative heads, which also have slots for a Phillips screwdriver. If you look closely, you'll notice it's somewhat asymmetrical. This is due to the use of different sides: a protruding glass one on the left and a traditional metal one on the right.
There is a small gap of a few millimeters between the chassis and the glass. This is how cool air will penetrate to the front fans.
After unscrewing the four screws, a pleasant pattern is revealed. Through it, the glow of the fans installed on the back of the panel will be visible. The focus was clearly on design, which required sacrificing bays, a dust filter, and good ventilation.

The top panel displays a more familiar approach. It features two slots for 120mm fans or a liquid cooling radiator, covered by a removable dust filter with magnetic attachment. Here, you'll also find interfaces, including one USB 3.0, two USB 2.0, a pair of audio jacks, three buttons (LED lighting control, reset, and power), and two moderate brightness indicators.
Additionally, there are a pair of sliders for adjusting the fan speed, divided into two separate channels. The top position of each slider is the maximum fan speed (1200 RPM for pre-installed solutions, low and comfortable noise). The middle position turns off the rotation, while the lighting operates independently. The bottom position corresponds to the minimum and almost silent fan speed of 625 RPM.
The black matte paint easily collects fingerprints—a real find for a forensic expert. However, they can be removed without much difficulty.
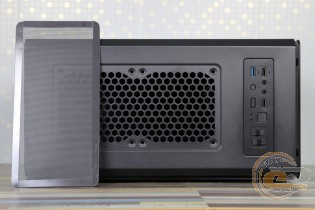
The rear panel resembles other solutions from this manufacturer that we've handled. At the top is a slot for a 120mm fan with a slight height adjustment option.
Below are seven expansion slots with covers: the top one is removable, while the rest need to be broken out. There is a retaining bar that allows you to secure all devices in the expansion slots with a pair of thumb screws. The usual threaded holes for individual fastening are also present.
At the bottom is the power supply unit. Overall, a fairly standard layout for 2018. It’s interesting to think about what the typical case structure will be like in 10 years. Any ideas? Feel free to share them in the comments.
The bottom panel features a removable dust filter under the power supply and four plastic feet of relatively small height, 18mm, with a beautiful chrome trim and soft pads. These help preserve the surface on which the system unit is installed and absorb vibrations created during its operation. However, it’s better not to place such a computer on a shaggy carpet.
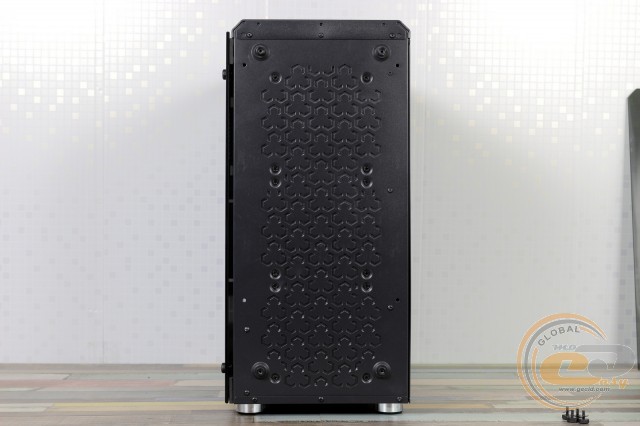
As mentioned earlier, the side panels differ significantly from each other. The right one is made of 0.69mm thick steel with reinforcement ribs and has a standard mounting with thumb screws at the back. The left one is made of dark tempered glass, 3.9mm thick, with a slight greenish tint. It is mounted similarly to the front panel.
Internal Structure


Under the glass at the four corners are pads that protect the most fragile element of the design from scratches. As for the internal layout, the division of the case into upper and lower parts provides ample free space.
Inside the new model, you can install ATX, microATX, and Mini-ITX motherboards, with the appropriate standoffs already installed for mounting. Notably, there is a cutout in the tray for convenient replacement of a large CPU cooler without removing the motherboard.

The front panel is occupied by three 120mm fans. They are equipped with LED lighting, so in addition to cooling, they are designed to refresh the case's appearance with bright colors. The fans are based on sleeve bearings, which are the least reliable but most affordable. If desired, you can replace the fans with a liquid cooling radiator (let’s recall the Vinga Sea and Vinga Typhoon), but remember the width limitation of 120mm.
What are the options for building a disk subsystem here? Firstly, there are two slots for SSDs on the tray near the front panel. They need to be secured from the back using the included screws. Another 2.5" drive can be installed behind the motherboard on the back of the tray, where there is a suitable bracket.
Meanwhile, a pair of 3.5" hard drives (or 2.5" SSDs) can be installed in a non-removable cage located in the lower tunnel of the case using flexible trays. Larger drives are mounted here without any tools, but you will need to use the included screws to secure the SSDs.


The cage is positioned at a certain distance from the front panel, limiting the length of the power supply. However, a 160mm model Seasonic X-560 Gold with a modular cable design fits without any issues. As expected from a model solution, the PSU installation area is thoughtfully equipped with anti-vibration elements on the bottom and side wall.

Both the power supply and drives in the cage will be additionally cooled thanks to a series of holes in the tunnel. Also, larger rectangular cutouts will allow cables to be discreetly routed to the lower part of the motherboard.


Inside, under the top panel, you can install a liquid cooling radiator up to 240mm or 120mm in length. Alternatively, 120mm fans can be added to the rear solution of the same size. Overall, there are plenty of spots for fans, but the solid front panel may significantly limit the intake of sufficient fresh air. Therefore, the need to install a series of exhaust fans is likely unnecessary.

We have no complaints about the ease of assembly. There is more than enough free space, so difficulties are not anticipated. As for the quality of edge processing, it is done well.


The ample free space inside the new model allows for the use of fairly large components. For example, the length of the graphics card can reach 350mm with the pre-installed front fans and 370mm without them. There will also be no problem finding space for a large CPU cooler—the height should not exceed 163mm, allowing the use of most solutions available on the market.
In addition to the above, note the availability of free space for hidden cabling, which will allow for a neat appearance of the system even when using an inexpensive power supply.
Behind the tray, between the SSD slots, there is a small hub board. It allows you to control three included fans and as many similar six-pin solutions from the interface panel. There are also four slots for three-pin fans.
The PCB is also responsible for the operation of the LED backlight. It is controlled by a button on the top panel, which allows you to select one of seven glow colors, two options for flashing different colors, or completely turn off the backlight.
Cables from the front panel are long enough, and the holes in the tray and tunnel allow them to be routed to the motherboard as discreetly as possible.
Name
Length, cm
USB 3.0
60
USB 2.0
70
HD Audio
70
Buttons and indicators
60
Testing
Processor
Intel Core i7-7700K (Socket LGA1151, 4.2 GHz, L3 8 MB)
Cooler
Scythe Mugen 3
Motherboard
ASUS PRIME Z270-A (Socket LGA1151)
RAM
2 x 8 GB DDR4-2400 HyperX Fury HX424C15FBK2/16
Graphics Card
ASUS GeForce GTX 980 MATRIX PLATINUM 4GB GDDR5
Storage
SSD KINGMAX SME35 Xvalue
Power Supply
Seasonic X-560 Gold (SS-560KM Active PFC, ATX, 560W)
Thermal Paste
Noctua NT-H1
The Vinga Polaris case was tested with three pre-installed fans operating at a maximum speed of 1200 RPM.
The "All System Load" chart shows component heating after 30 minutes of 3DMark Fire Strike in Ultra mode (4K resolution). The "System Component Burn" mode demonstrates temperatures under load with AIDA64 applications (Stress CPU and FPU) and MSI Kombustor for 15 minutes.
Despite the use of three fans, the "bottleneck" of the cooling system remains the front panel, which restricts air intake. Although component heating is far from critical, the new model noticeably lags behind other cases of a similar format. Installing an exhaust fan should somewhat improve the situation. By the way, you can move one of the included fans to the rear panel, but in this case, the front lighting will not look as impressive.
Conclusions
The Vinga Polaris case with glass panels is designed for users whose aesthetic preferences go beyond the usual. Do you want your system unit to be a real decoration of the room? The new model is definitely created for you.
Accompanying these panels are three included fans with pleasant LED backlighting that can be adjusted and have variable rotation speeds. They are located behind the front panel and bring this solution to life, shimmering in seven colors. Combined with illuminated internal components, you can create a very spectacular system that will please the eye 24 hours a day (if you have insomnia).
All is well with this, but how about everything else? We have a very spacious solution capable of accommodating an average work or gaming system. However, due to the weak ventilation of the front panel, the efficiency of the three fans is low. Therefore, we advise everyone wishing to purchase the Vinga Polaris case to consider energy-efficient components and install an additional exhaust fan.
Did you like the new model? We look forward to your comments under the review.
Advantages:
- Memorable original design;
- Front panel and left side made of dark glass;
- Support for 370 mm graphics cards and 163 mm CPU coolers;
- Ability to mount up to six fans and 240 mm radiators;
- Ability to install two 3.5" and three 2.5" drives;
- Presence of dust filters on the bottom and top panel, soft feet, and vibration-absorbing elements at the PSU installation site;
- Three pre-installed fans with LED backlighting;
- Fan speed control on the front panel;
- Ability to hide cable management.
Features:
- No external bays;
- Fans based on relatively short-lived sleeve bearings.
Author: Oles Paholok
Translation: Yuriy Koval
We express our gratitude to ASUS, Intel, HyperX, Noctua, and Sea Sonic Electronics for providing equipment for the test bench.